HOW TO CREATE A FLAT LAY
- Diane Chung

- Jul 8, 2020
- 2 min read
Updated: Jul 26, 2020
Edible flowers have been the trend for a while during this pandemic, and let's face it, we want all the flowers there are! After looking at some recipes, youtube, and @taramiltea 's lovely feed, I felt inspired to create the lovely detailed pictures using all the flowers in our backyard!
Summer is especially a great time to make these, as there are many edible wildflowers growing around that you can derive inspiration from. Here's how YOU can create a delicate photo!
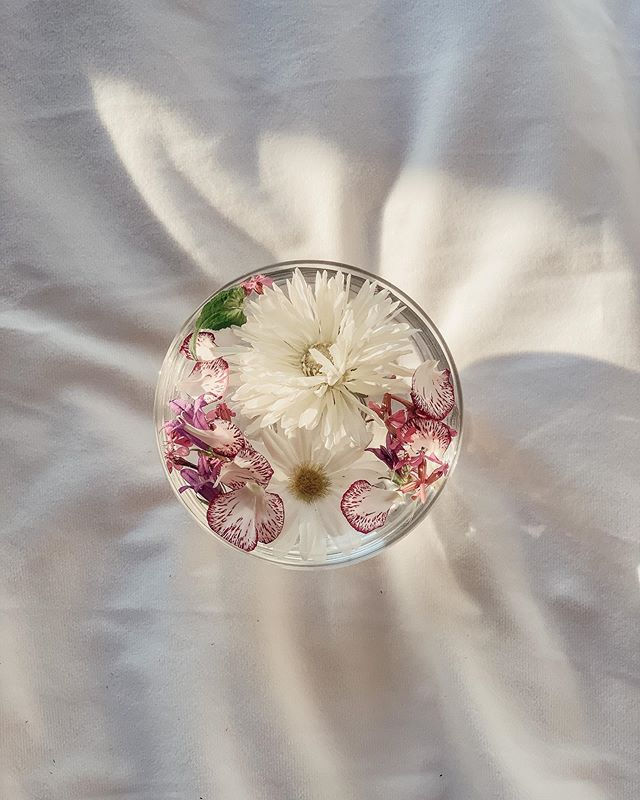
Here's an example of a minimalistic flat lay:
From minimal to extravagant, here are all the steps you'll need to create your own flat lay using edible flowers!
HOW TO CREATE AN EDIBLE FLOWER FLAT LAY:
Steps:
1) Choose your flowers! If you are planning on only using the flowers for a photo session, you don't have to choose edible flowers and can choose any variety of flowers you want to use. I recommend using light flowers in conjunction with darker colored ones to bring out the contrast in the photo. In this photo, there were a variety of edible and non edible flowers.
2) If you do want to go ahead and choose edible flowers to serve to your guests, please only use flowers you have bought from the store and ones that have not been sprayed with pesticide. Be careful where you choose your flowers, and what flowers you are using. Here is a list of edible flowers that you can use!
Violets, Common Daisies, Roses, Lavender, Chrysanthemum, Pansy, Hibiscus,Chicory, Dandelion, Marigold, Sage, Common Sunflowers.
3) Clean your edible flowers. I washed my edible flowers gently multiple times and then left them in salt water for 30-40 minutes to bring out bacteria and bugs that may be left behind. Afterwards, I dried them with a paper towel and let them air dry for 10 minutes.
4) Choose your liquid! I highly recommend using only water, or liquid that is not carbonated. Carbonated liquid makes the flowers sink and not look appetizing for a photo. You can use water, water with food coloring, milk, or milk with food coloring.
5) Pour your liquid into your glass of choice. The wide the rim the better! Fill to the top.
6) Add your flowers in any array you wish, starting with the heaviest then moving on to the lighter ones! For my photos, I plucked several petals and added them along to the larger daisies in the middle. I also added some green stems to create better contrast. Play around and see what you think looks best!
7) Add a book, basket, light colored materials around your creation, and create your masterpiece :)
8) Replace your water bowl with a skincare product or accessory instead!
That's it! I hope this inspires you to create something special for yourself or your guests~
With practice, here are some flat lays I produced both for myself and for a client:


Comments